Problem Management Work Instructions in ITSM
This work instruction guide will walk you through the Problem Management lifecycle as implemented in the ITSM application. The Problem Management module enables IT Staff and Problem Coordinators to investigate root causes, document workarounds, and apply permanent fixes to prevent recurring incidents.
Role and Access Control
- End Users: Cannot submit or view problem records from the ITSM portal.
- ITIL Users / IT Staff / Problem Coordinators: Can create, own, update, and resolve problem records.
Accessing the Problem Management Module
To access the Problem Management interface, open your web browser and navigate to:
https://itsm.payg.in/login
Problem Lifecycle States
The problem record progresses through several states shown on the progress step bar at the top of the form:
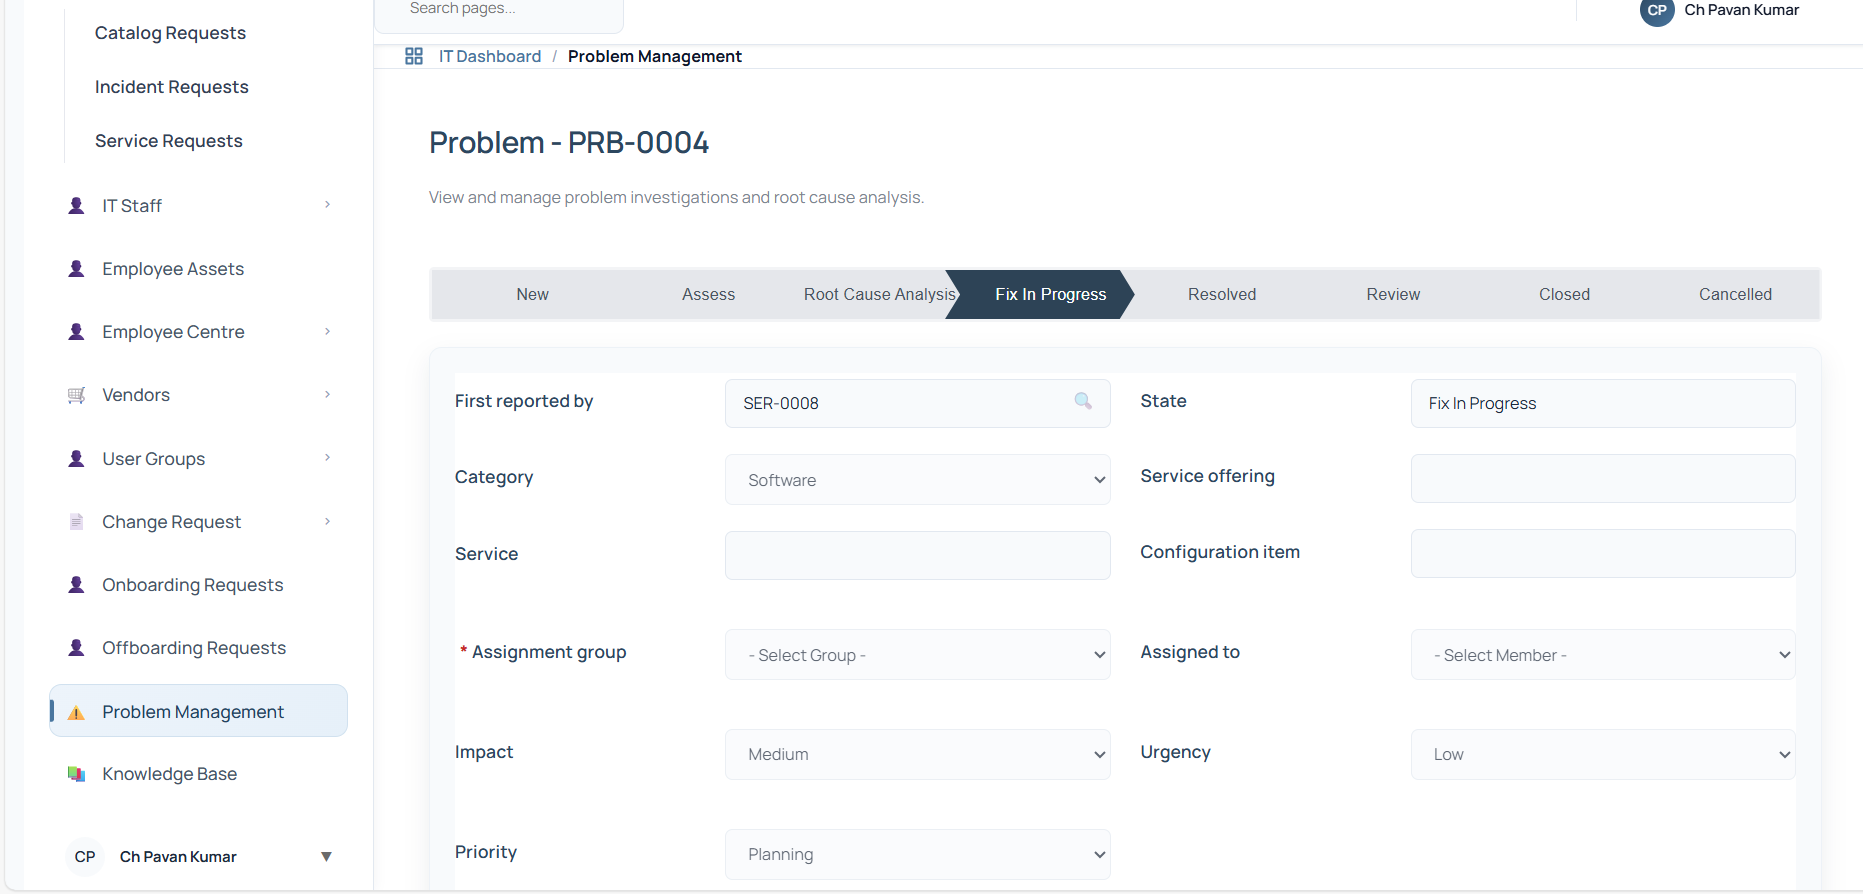
- New: The initial state when a problem record is created.
- Assess: The problem is under assessment by the assigned group.
- Root Cause Analysis (RCA): The team investigates the root cause of the problem.
- Fix In Progress: A fix is being implemented.
- Resolved: A permanent fix has been successfully applied.
- Closed: The problem is officially solved and archived.
- Cancelled: The problem record has been cancelled.
Creating a Problem Record
To create a new problem ticket, follow these steps:
- From the main Problem list view, click the + New button in the top right corner.
- Fill out the fields on the form. Pay attention to the mandatory fields:
- Reported by (Mandatory): Click the View link to open the Select Requests pop-up modal. Use the search bar to locate the source request (Incident, Catalog Request, etc.), and click Select. This automatically imports the requester's name, category, service, offering, and configuration item.
- State: Set to New initially.
- Assignment Group (Mandatory): Search and select the department group responsible for working on the problem.
- Assigned to (Mandatory): Select the specific team member from the group. Note: You must assign the ticket to a member before you can progress the ticket to later states.
- Impact & Urgency (Mandatory): Set to Low, Medium, or High depending on severity.
- Priority: Computed automatically (Planning, Low, Moderate, High, Critical).
- Statement (Mandatory): Enter a short summary of the issue. Note: Special characters and numbers are not allowed in this field.
- Description (Mandatory): Enter the technical details. Note: Special characters and numbers are not allowed in this field.
- Click Save at the bottom of the page. The problem ticket is generated and transitions to the Assess state.
State Transition Workflows
1. Assessing the Problem
Once the problem is in Assess: - If the ticket is valid, select an assignee in the Assigned to field and click Confirm RCA to move the ticket to Root Cause Analysis. - If the ticket is invalid or a duplicate, click Cancel to cancel the ticket. A popup will prompt you to fill in a mandatory Canceled reason.
2. Root Cause Analysis (RCA)
Once the problem is in Root Cause Analysis: - Navigate to the Analysis Information tab. Input the Workaround and Cause notes (both are mandatory). - Engage with stakeholders to identify the fix. - Click Fix to transition the ticket to Fix In Progress. A popup will appear prompting you for a mandatory Fix Note and optional Cause notes.
3. Fix In Progress
Once the problem is in Fix In Progress: - If the fix fails or needs further investigation, click Re-analyse to send the ticket back to the Root Cause Analysis state. - If the fix cannot be deployed immediately due to high risk or cost, click Accept Risk. A popup will prompt you for: - Risk Accepted Reason (Mandatory) - Workaround (Mandatory) - Workaround Applied checkbox Clicking Confirm Risk Acceptance transitions the ticket directly to the Closed state with the resolution code set to "Closed". - Once the permanent fix is applied, click Resolve to move the ticket to Resolved.
4. Resolving and Closing
Once the problem is in Resolved: - Verify that the issue is permanently eliminated. - Click Close Problem to permanently archive the ticket, transitioning it to Closed (read-only).
Form Tabs and Activity Log
The bottom section of the problem record contains tabs to manage notes, analysis, and metadata:
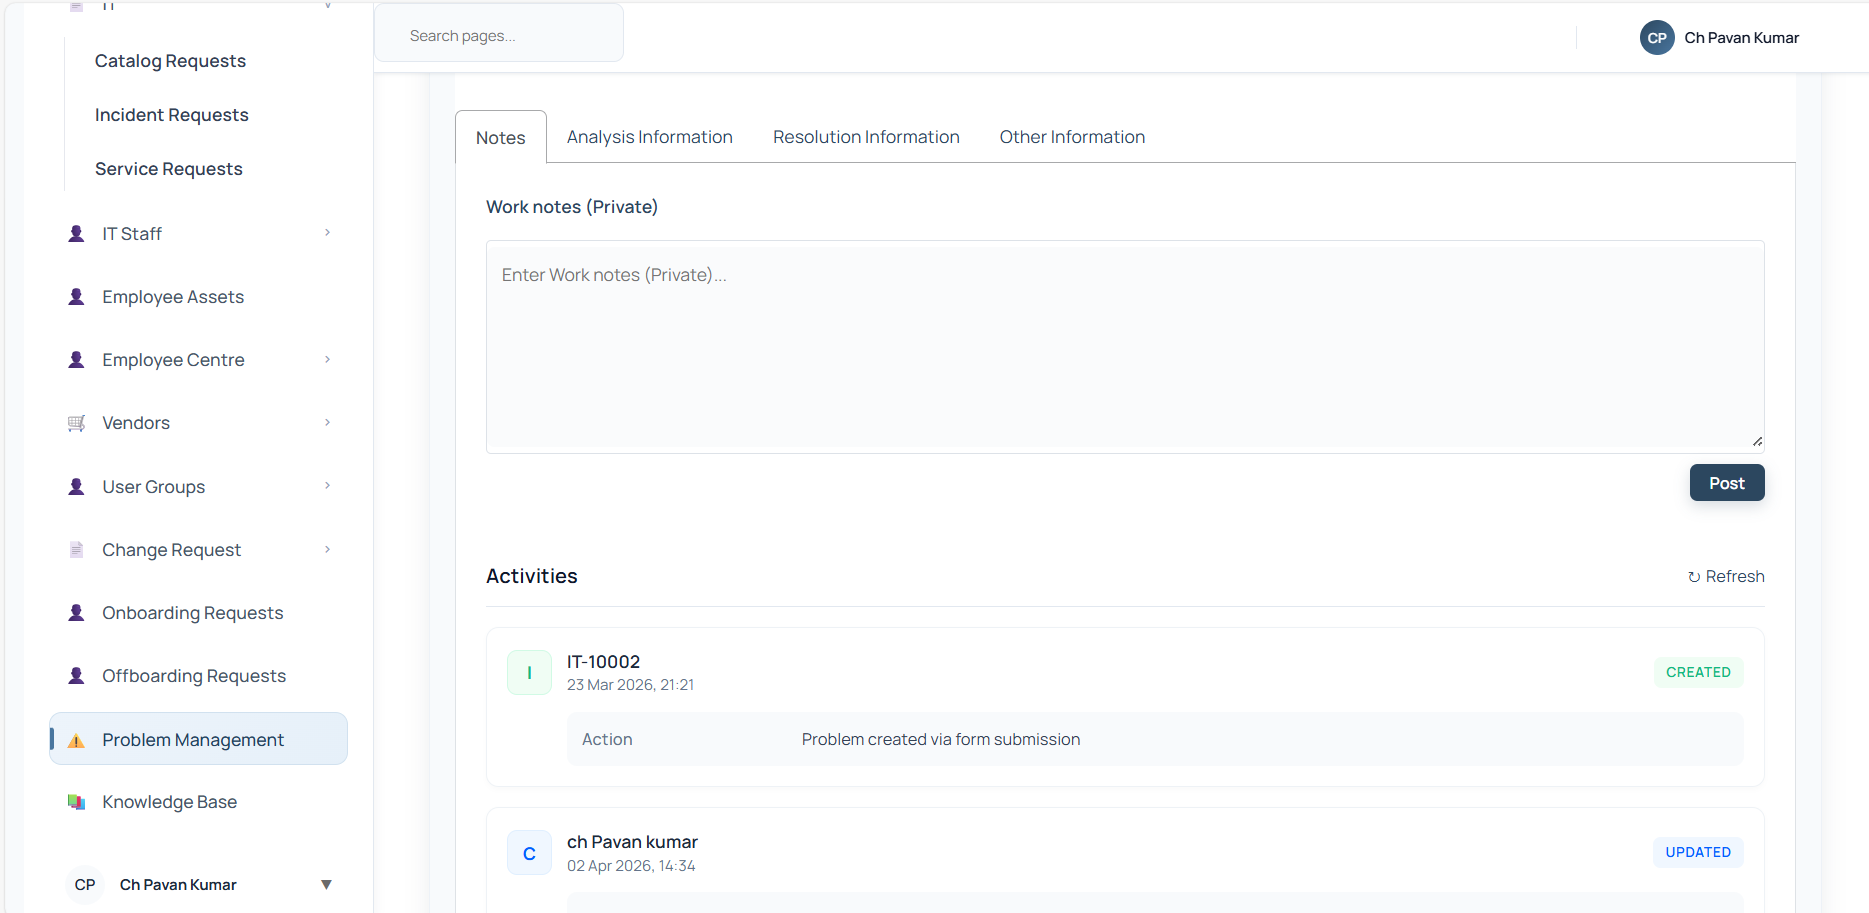
1. Notes Tab
- Work notes: Type internal team updates and click Post to save.
- Activities: A chronological feed of all updates, status shifts, work note posts, and field modifications, showing the author and timestamp of each action.
2. Analysis Information Tab
- Contains the mandatory Workaround and Cause notes text fields used during the RCA phase.
3. Resolution Information Tab
- Shows read-only fields for Resolved by and Resolved timestamps.
- Contains the mandatory Fix Note text area used when moving to the fix stage.
4. Other Information Tab
- Displays read-only logging metadata: Opened by, Opened date, Updated by, Updated date, Closed by, and Closed date.