Normal Change Management Work Instructions in OrionX
Role: itil, change owner, change manager, change implementer, CAB
Available for Teams: All
Normal changes describe any changes that are not standard or emergency changes. These changes are further categorized as minor, significant, or major, based on the amount of risk involved. They are not pre-authorized or scheduled, but also do not carry the same urgency as emergency changes.
Working on Normal Change
This knowledge article explains how the Normal Change Management process works in OrionX for PayG users.
Creating a Normal Change Record
A Normal Change Record can be created by following these steps:
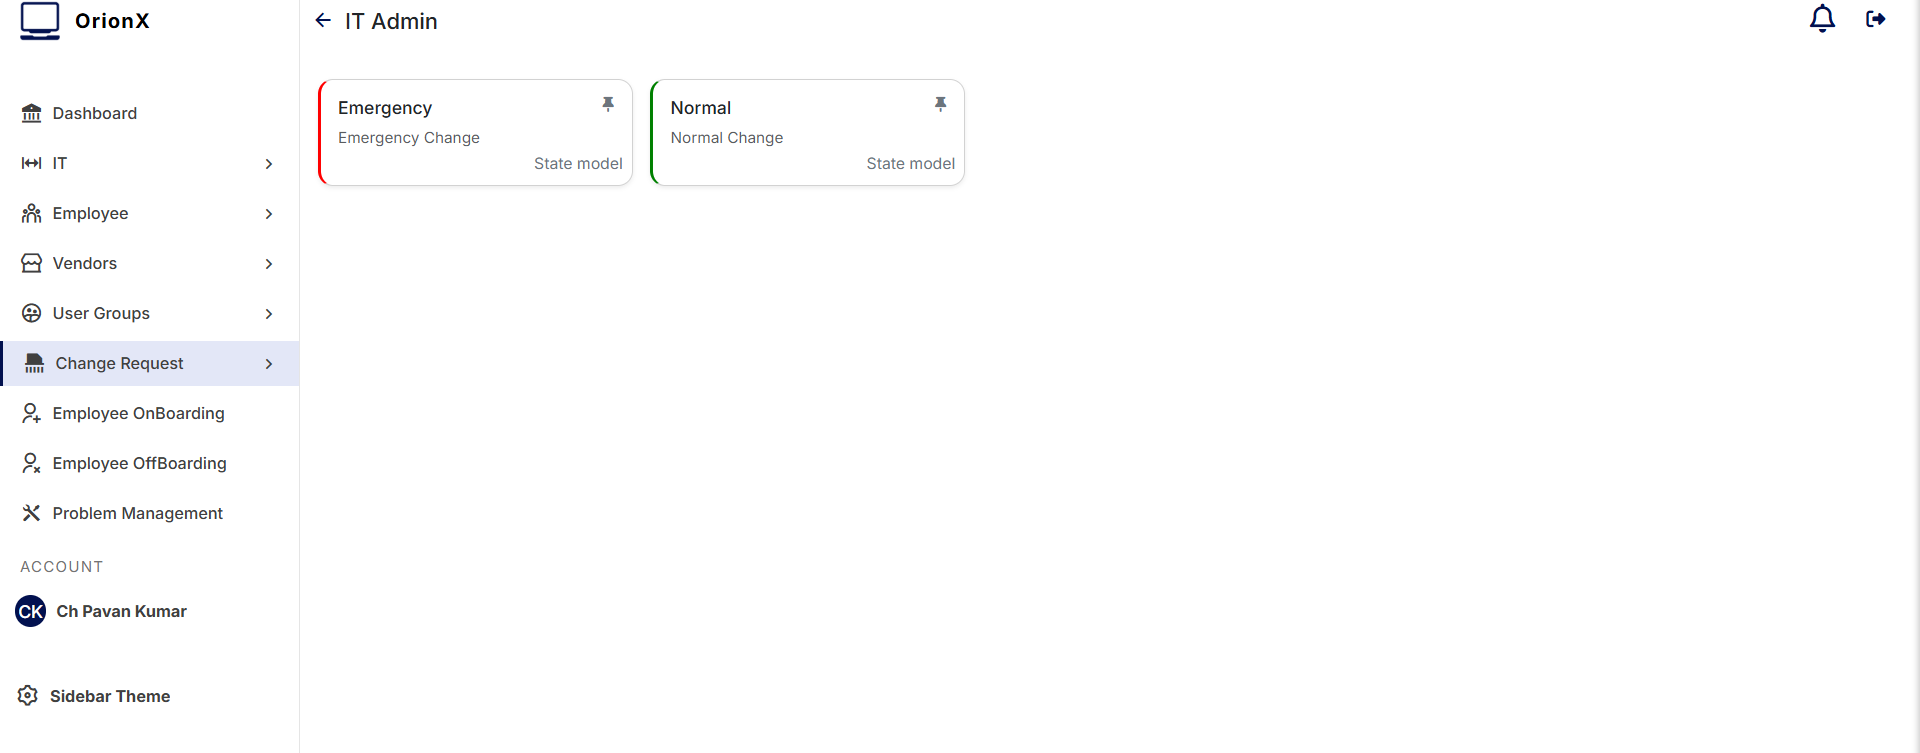
- From the OrionX Navigator, type Change and select Create New.
- From the next screen under Create a change request, select Normal under All options.
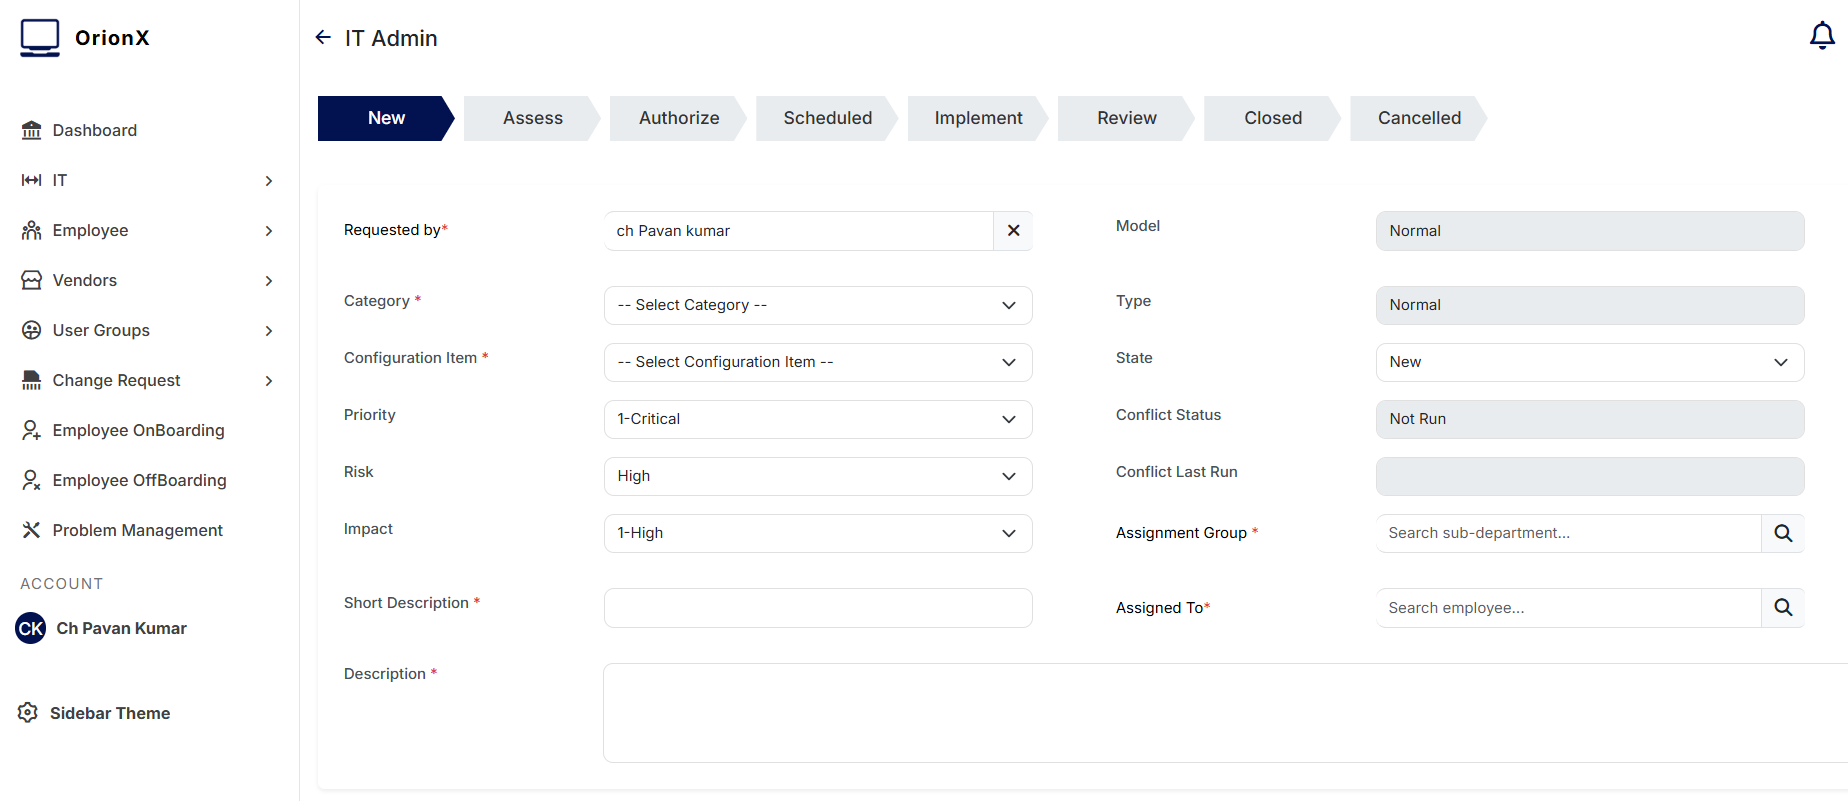
- A new Normal Change form opens where you must fill all mandatory and other details of the change.
Required Fields
In the New Change Request form, a requester has to fill the details such as:
- Requested By – Change Initiator or Change Requestor who actually submits a change.
- Category – Select the right Category for your change. It will also be used later for reporting.
- Configuration Item – The IT service or IT infrastructure item like Cloud App Server, Cloud Storage, Account, Disk Volume, etc. that is impacted and needs change.
- Priority – Set the priority based on the impact and urgency of your change.
- Risk – Select an appropriate value based on the Risk and Impact Analysis.
- Impact – Specify how widely the change will affect users/services.
- Short Description – A short one-line description of the change.
- Description – A detailed description of what you want to implement.
- Assignment Group – The support group that will manage this change.
- Additional Planning / Information – Any extra details needed for assessment.
Planning, Risk and Impact
Planning is critical to Normal Change Management. Typical planning information includes:
- Planning > Risk and Impact Analysis
- Document details of risks and impacts involved in implementing the change.
-
Mention positive results you expect after change is successfully implemented.
-
Planning > Backout Plan
- Describe how you will roll back the change if something goes wrong.
-
Include steps and reference items required to revert to the previous state.
-
Planning > Test Plan
-
Provide steps and testing details that will be followed before, during and after the change.
-
Schedule > Planned Start Date & Time
-
Date and time when you are planning to start implementation.
-
Schedule > Planned End Date & Time
-
Date and time when you are planning to complete implementation.
-
You may also attach presentations/documents with detailed plans.
After filling all mandatory fields, click Submit to save your change record.
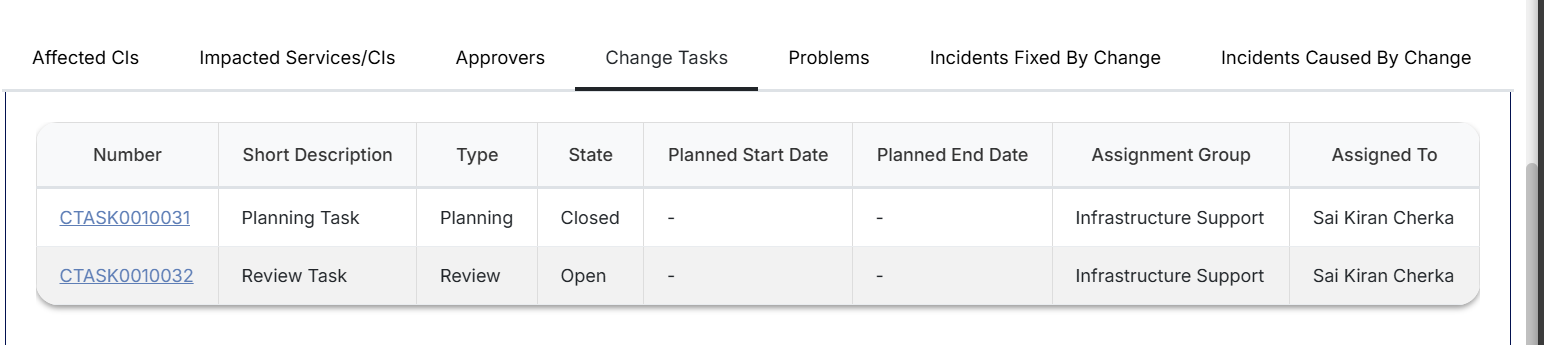
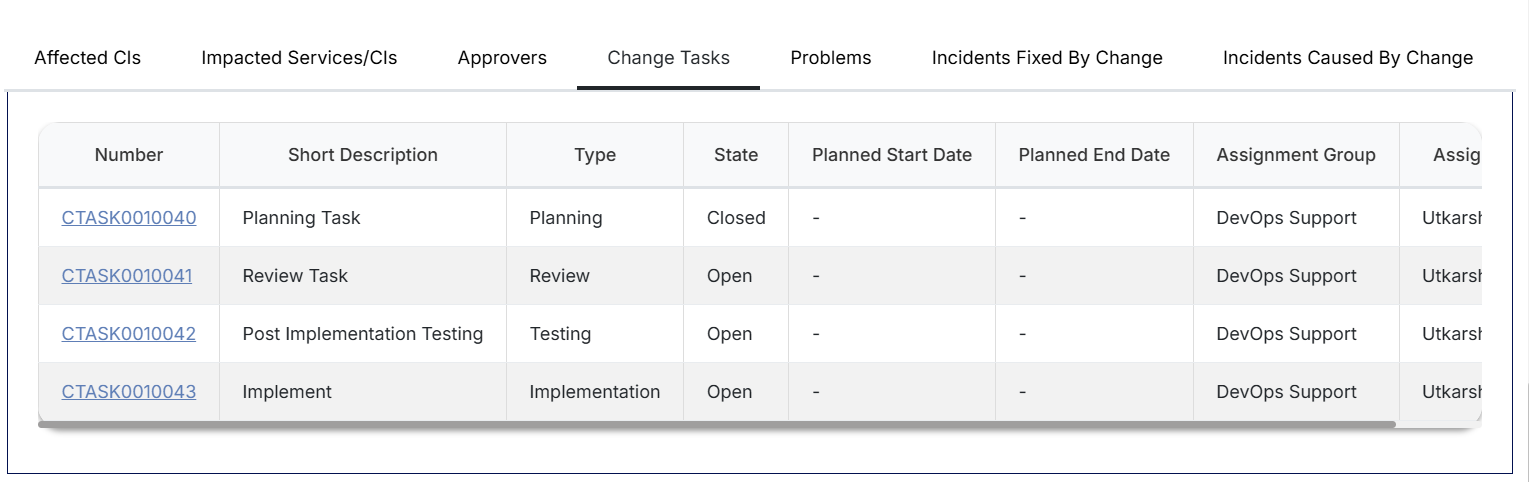
Change Tasks
After you submit a Normal Change Request and it is created/submitted/created:
- Two Change Tasks are created automatically (shown in the Change Tasks tab):
- Planning Task – Used for planning activities you would carry out during the assessment phase.
- Review Task – Used for Post Implementation Review (PIR).
- Additional tasks can be created by clicking New on the Change Tasks related list.
- The number of tasks gives an idea of the number of activities planned.
- Email notifications are sent to stakeholders after change creation and as tasks are created/updated.
Change Owner / Manager Responsibilities
Only the Change Owner/Change Manager can drive the change through its life cycle. When a new change is created, the Change Owner should:
- Review details in the Change Record and confirm that it is a valid change.
- Ensure the Change record is assigned to the right person/team for planning.
- Confirm all planning-related tasks have been created and are updated.
- Make sure CAB (Change Advisory Board) meetings are conducted as required.
- Coordinate with the Change Requestor and other stakeholders to capture important details.
- Ensure that all mandatory tasks are completed and closed before change closure.
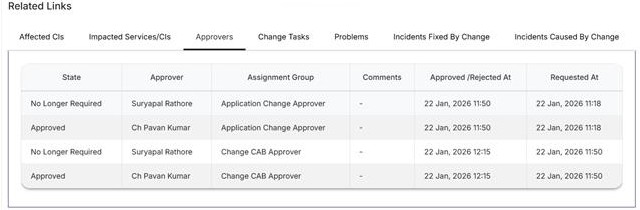
Change Approval / Rejection
Once all required details are filled:
- Change Manager records the outcome of CAB meetings in Notes & Closure details.
- For a Normal Change, two levels of approvals are typically used:
- Technical Approval
- Business Approval
- Approvers receive notifications and can approve from My Approvals.
- Change can be approved or rejected at each approval stage.
- Only after approvals are complete, the change should move to the next state.
Change Implementation
After approvals:
- The Change Owner/Manager moves the change to the Implementation phase.
- Implementation and testing tasks are carried out as per the implementation plan.
- Status of tasks is updated as work progresses.
- The change record is updated with:
- Actual start and end dates
- Implementation notes
- Any deviations from the original plan

- Clicking on Implement button will move the Change to Implement phase and this will create additional tasks for implementation and Testing. Please note that the Change should be moved to Implementation phase during the Change Window only otherwise it will be breach of process and you cannot move further.
Change Review (PIR – Post Implementation Review)
After implementation is completed:
- PIR / Review Task is carried out to:
- Confirm that the change objectives are met
- Validate there are no outstanding issues
- Capture any lessons learned
- Review details are updated in the Review Task and in the Change record.

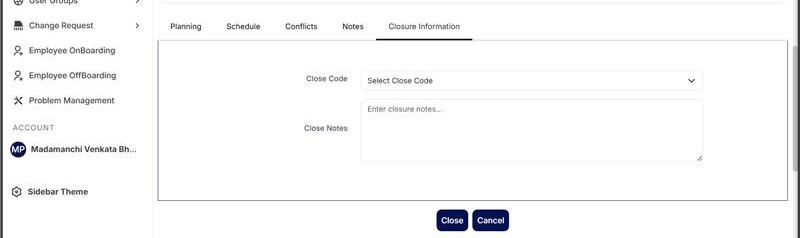
Change Closure
Once PIR and all tasks are completed:
- Change Owner moves the change to Closed state.
- Provide:
- Resolution Code
- Closure Notes (summary of work done and outcome)
- Ensure all related incidents/problems/requests associated with this change are updated accordingly.
- Use Conflict Calendar (if available) to ensure the change is not conflicting with other planned activities.